Billiards & Snooker — 16 · Cue-Ball Control: Pro Patterns
Post 12 showed where to send the white. This post shows how good players choose the shot that gets it there: they read every tip and power for one pot like a map, set pace before spin, open the reds off the blue, pick the key ball before the last red, and plan the six colours as one chain. Every picture is a physics-model run, drawn with the balls and the cue only.
Series map. ★ Basics: 01 Cue action and elevation → 02 Aiming and potting → 03 Tip and power → 04 Where the white goes · ★★ Club: 05 Side spin → 06 Cut and side into pockets → 07 Cushions → 08 Doubles · ★★★ Advanced: 09 Escaping snookers → 10 Multi-ball shots → 11 Safety → 12 Position play · ★★★★ Hard: 13 Break-building → 14 Special shots · Reference: 15 Rules, tactics and practice · ★★★★★ Pro: 16 Cue-ball control (this post).
Learning Outcome
- Read one pot as a map of where the white can finish.
- Know which choices still pot the ball, and which leave it short.
- Set the pace first, then the tip.
- Pick the zone, then read the map backwards for the shot.
- Open the reds off the blue, and choose the key ball before the last red.
- Plan the six colours as one chain of short, easy moves.
Chapter 1 — Read the white's options
1 · The position map
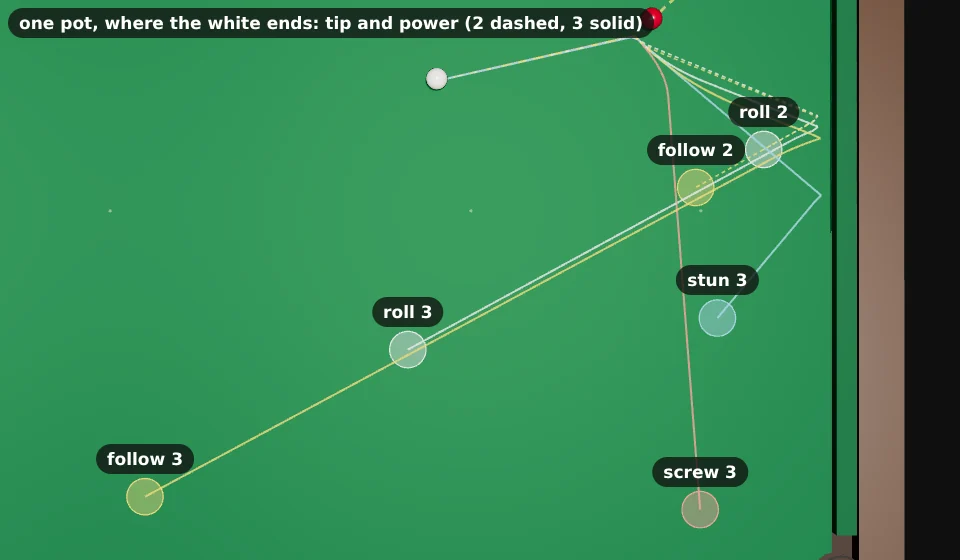
One red, one pocket, one cut (30°). Only the tip and the power change. Each ring is where the white stops. Good players know this map for the pots they meet most, before they get down on the shot.
2 · Which choices pot the red
Not every choice works. The same map as a table (model):
| Power | Tip | Red | White stops |
|---|---|---|---|
| 2 | screw | stops short ✗ | – |
| 2 | stun | stops short ✗ | – |
| 2 | roll | potted | 22 cm from the black spot |
| 2 | follow | potted | 6 cm from the black spot |
| 3 | screw | potted | 15 cm off the bottom side cushion |
| 3 | stun | potted | 27 cm below the black spot |
| 3 | roll | potted | 38 cm from the pink spot |
| 3 | follow | potted | 18 cm off the bottom cushion, near the middle pocket |
- Screw and stun need pace. Backspin slows the white before contact, so at power 2 the red does not reach the pocket.
- Follow at power 2 runs onto the black spot. In a frame the black is there: the white would kiss it.
- Follow at power 3 heads for the middle pocket. It stops 18 cm off the cushion here; a little more pace risks an in-off.
Watch out: a shot that leaves perfect position but does not pot is the worst shot on the map. The pot comes first.
3 · Pace first, then tip
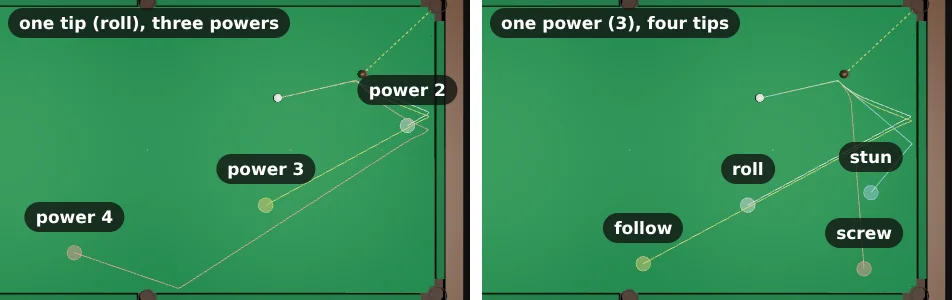
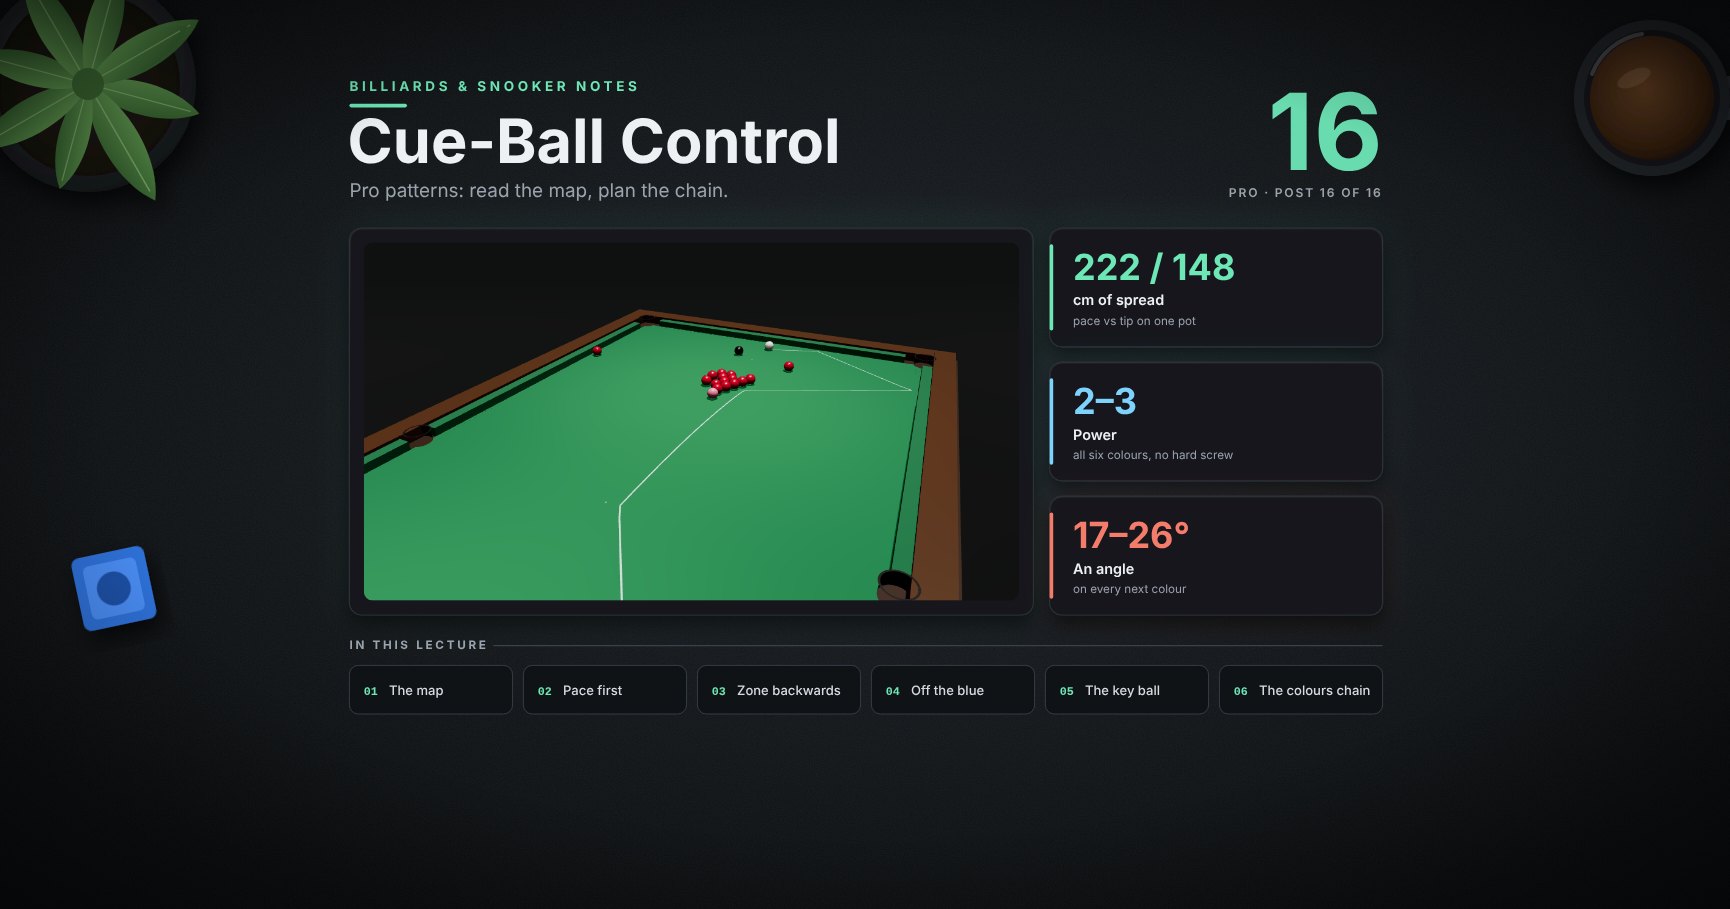
Change only the power, and the end points spread over 222 cm. Change only the tip at power 3, and they spread over 148 cm (model).
| Roll, power | The white travels |
|---|---|
| 2 | 117 cm |
| 3 | 217 cm |
| 4 | 358 cm |
So pace is the bigger lever. Choose the pace that takes the white to the zone, then use the tip to bend the path. A pace you play every day is worth more than a big spin you play once a frame.
Trick: practise the same pot at three set paces until each one lands in its own ring. That is the map in your arm.
4 · Pick the zone, then read the map backwards
Start from the next ball, not from this one:
| Next ball | Zone (section 1 map) | The shot |
|---|---|---|
| the black, into a top corner | near the black spot, a little off it | roll, power 2 |
| the black, from below | 27 cm below the black spot | stun, power 3 |
| a red near the pink | below the pink | roll, power 3 |
| a ball on the bottom side cushion | 15 cm off it, level with the black | screw, power 3 |
| the blue | towards the bottom middle pocket | follow, power 3, watch the in-off |
The pro habit: zone → ring on the map → tip and power. If two choices reach the zone, take the one with the softer pace and the plainer tip.
Chapter 2 — The reds
5 · Into the reds off the blue
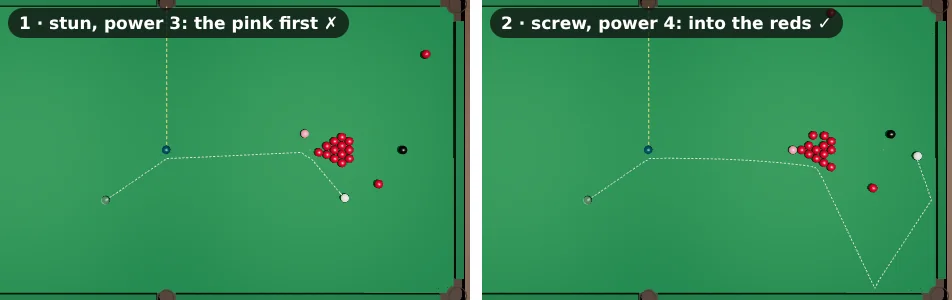
Early in a frame the reds are still in a bunch behind the pink. A good way in is off the blue (coaching advice): pot the blue and let the white carry on into the reds. Here the blue is a 55° cut into the top middle pocket. Two choices (model):
| Choice | The white's next ball | Reds moved more than 30 cm |
|---|---|---|
| stun, power 3 | the pink ✗ | 1 |
| screw, power 4 | a red ✓ | 2 |
Stun sends the white along the tangent line, straight into the pink: a kiss you cannot plan. Screw bends the path behind that line, and the extra pace carries the white into the side of the reds.
Watch out: opening the reds is not a pot. Plan where the white ends too: here it runs on to the top end, near the black.
6 · The key ball
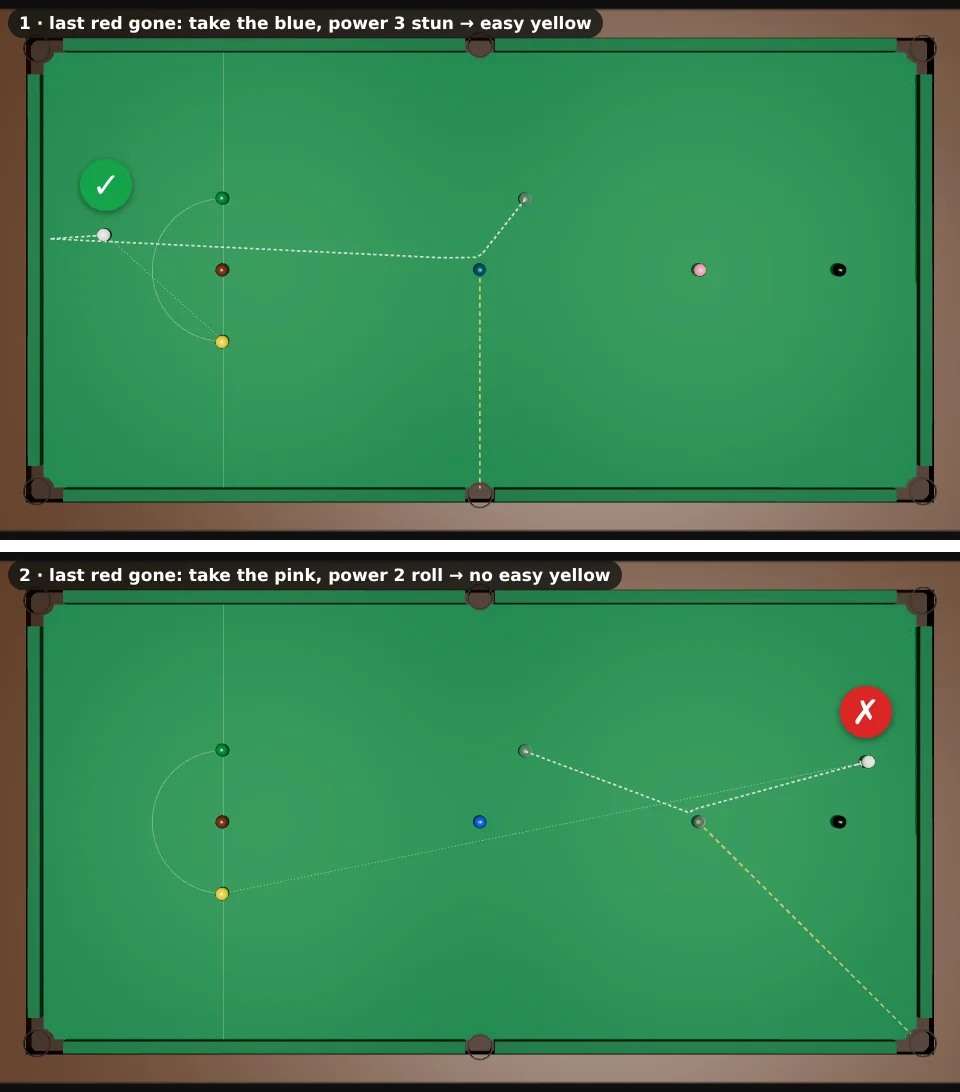
The key ball is the colour you take with the last red, chosen so the white lands for the yellow (coaching advice). Here the last red is gone and the white sits just above the blue. What each colour leaves (model):
| Key ball | Pots? | The white ends | The yellow next |
|---|---|---|---|
| blue, bottom middle, power 3 stun | yes | near the baulk cushion, 65 cm from the yellow | easy: 13° into the bottom middle ✓ |
| pink | yes, 10 ways in the model | power 2 roll: at the top end, 268 cm away | not easy from any of the 10 ✗ |
| black | no pocket at a cut of 45° or less | – | – |
"Easy" here means: the white 25–120 cm from the yellow, a cut of 8–35°, the yellow within 150 cm of the pocket, and both lines clear.
Trick: choose the key ball before you pot the last red, then play the last red to land on it.
Chapter 3 — The colours as one chain
7 · Plan all six first
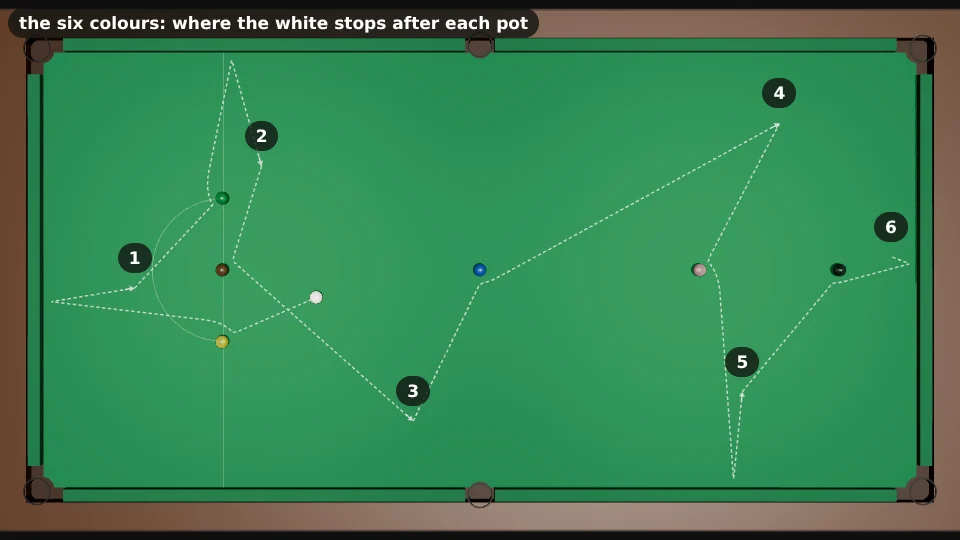
After the last red, the colours go yellow to black and stay down. Before the yellow, good players walk the whole chain in their head: each pot sends the white to an easy angle on the next colour. Here is one chain the model found, from the white just right of the yellow:
| # | Ball | Power | Tip | The white moves | Next ball, cut | |
|---|---|---|---|---|---|---|
| 1 | yellow | bottom left | 3 | roll | 75 cm | green, 17° |
| 2 | green | top middle | 3 | roll | 72 cm | brown, 22° |
| 3 | brown | bottom left | 3 | stun | 121 cm | blue, 26° |
| 4 | blue | top middle | 2 | follow | 193 cm | pink, 17° |
| 5 | pink | bottom middle | 3 | roll | 111 cm | black, 21° |
| 6 | black | top right | 2 | roll | 82 cm | – |
8 · Shot by shot
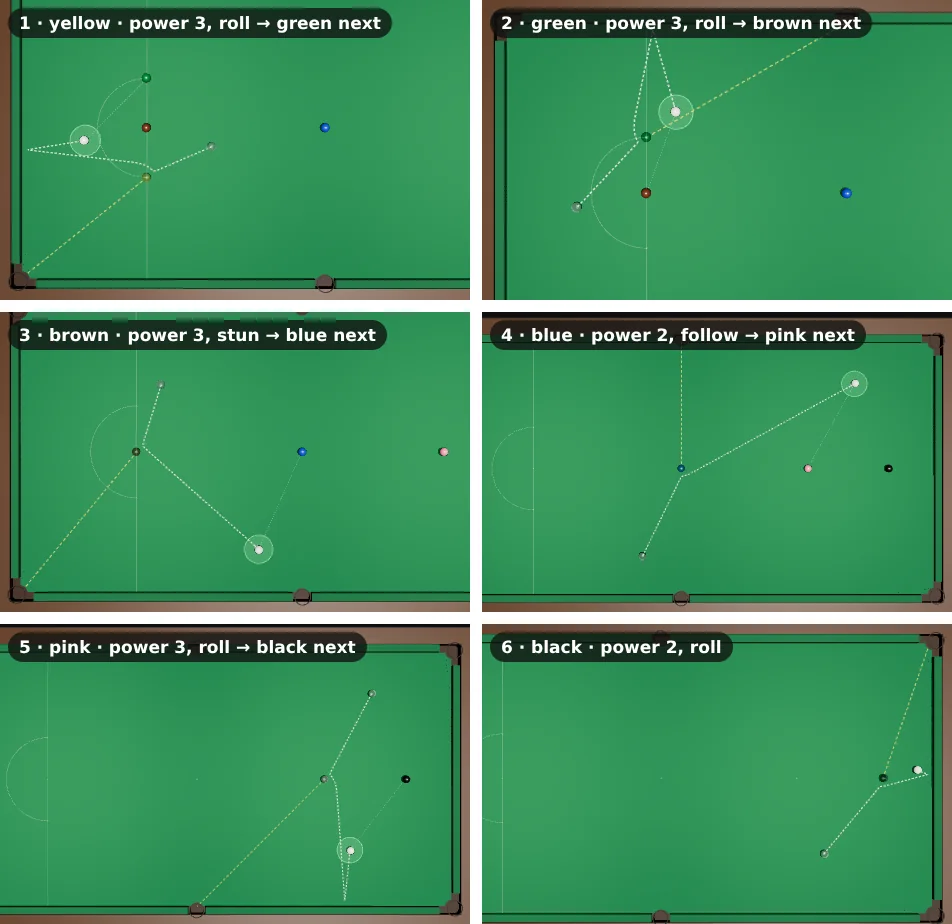
Look at what the chain does not use: no power 4 or 5, no hard screw, no side. Every next cut is between 17° and 26°: an angle to work with, never straight and never thin.
Trick: an angle of about 15–30° on the next ball is what lets the next shot move the white (post 12, section 3).
9 · The long move: the blue
The biggest move in the chain is 193 cm, off the blue (shot 4). It is still a power 2 shot: follow does the work and the white runs with the natural angle up the table. The long move is played with the softest pace that gets there, so the error stays small.
Common pitfall: hitting the blue hard "to get up the table". The extra pace spreads the stopping point (section 3), and the pink cut becomes a guess.
10 · When position goes wrong
Even good players miss the zone. Then (coaching advice):
| You are left with | Do this |
|---|---|
| a pot, but no shot onto the next ball | look for another pocket for this ball first |
| a long or thin pot | play the pot with a safety in mind: pace that leaves the white safe if it misses (post 11) |
| no fair pot | play the safety now, not the gamble |
| a ball the plan skipped | re-plan from here: three balls ahead again |
11 · The pro checklist
Before each shot in a break:
| Ask | Section |
|---|---|
| Which zone for the next ball, and the one after? | 4, 7 |
| Which ring on the map lands there? | 1 |
| Does that choice still pot the ball? | 2 |
| Can I get there with less pace? | 3 |
| Is the path clear of other balls and pockets? | 2 (kiss, in-off) |
| Before the last red: which key ball? | 6 |
| If I miss the zone, what is the next-best shot? | 10 |
Try it at the table
| Drill | Set-up | Look for |
|---|---|---|
| The map | the section 1 red and white; play the six potting choices | each white stops in its own ring |
| Short at power 2 | the same red, power 2 screw | the red stops short: feel it, then add pace |
| Pace ladder | the same red, roll, power 2, 3, 4 | three clearly different stopping places |
| Zone first | a friend names a zone; you choose tip and power | land in it three times out of five |
| Off the blue | the section 5 set-up | the white reaches the reds after the blue |
| The chain | the colours on their spots, the white just right of the yellow | clear all six with power 2–3 only |
Cheat-sheet
| Map | for one pot: every tip and power, and where the white stops |
| Pot first | power 2 screw or stun can leave the red short |
| Pace first | pace spreads the ending more than the tip (222 cm vs 148 cm here) |
| Backwards | next zone → ring on the map → tip and power |
| Reds | open them off the blue, with screw and pace |
| Key ball | choose the colour with the last red that leaves the yellow |
| Colours | short moves, power 2–3, a 17–26° angle on each next ball |
| Gone wrong | another pocket, a pot with safety in mind, or the safety |
Planned future extensions
The series ends here for now. It is numbered so later lessons can slot in without retitling the posts above.
| Possible post | What it would add |
|---|---|
| 17 · Reading the pack | how reds split by where and how hard the white hits the pack |
| 18 · Long potting | the long red and long blue in detail, with the cue action checks |
| 19 · Doubles and plants, harder | two-cushion doubles, a plant off a cushion |
| 20 · Match play | the first frames, playing a faster or slower opponent, keeping calm |
| 21 · Equipment | tips, chalk, cue weight and length, and how they change a shot |
| 22 · Six-red and other formats | the Six Reds rules and how the tactics change |
What's next
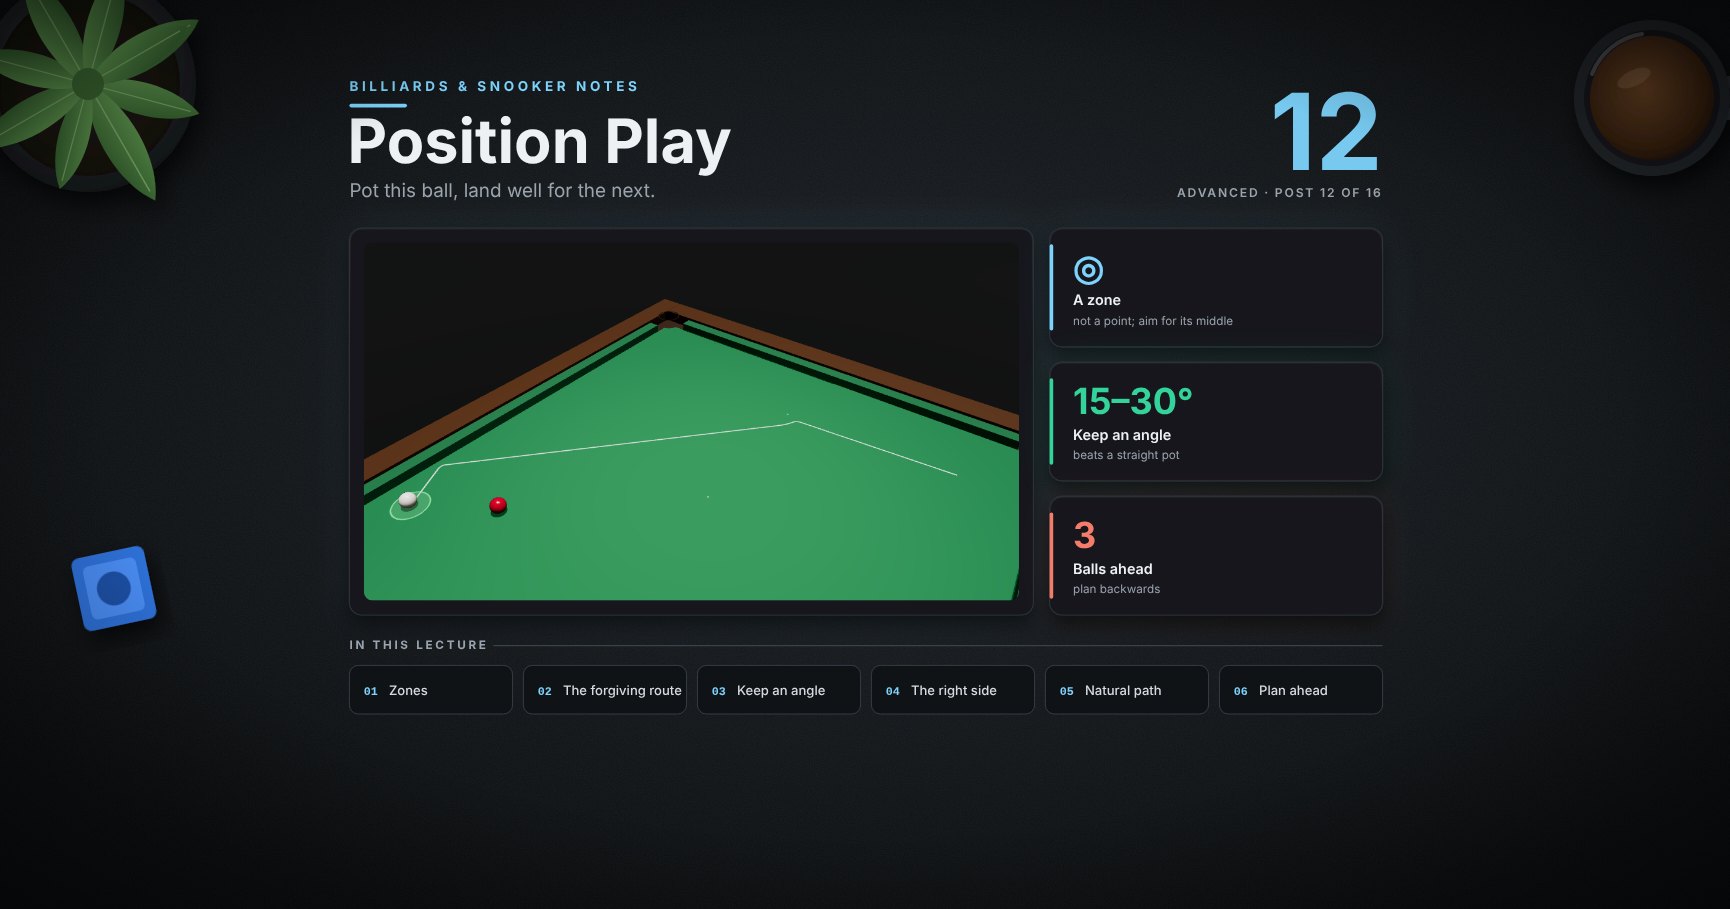
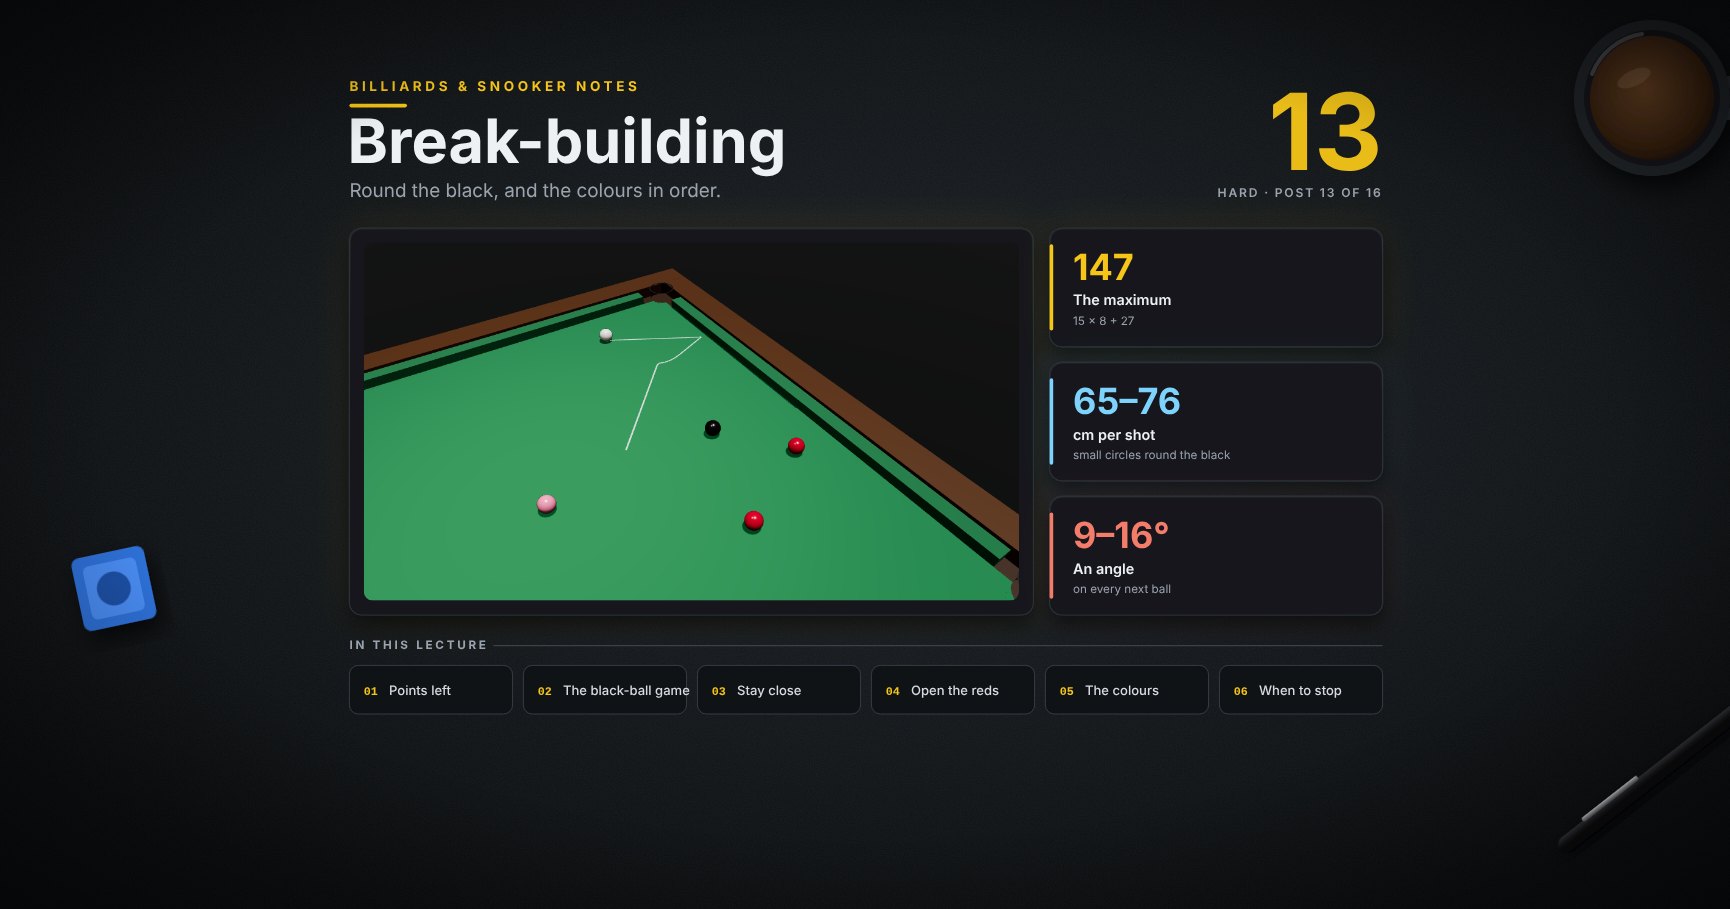
This is the last lesson for now. Go back to 12 · Position play and 13 · Break-building with the map in mind: each picture there is one ring on a map like section 1.
References
- WPBSA, Official Rules of the Games of Snooker and English Billiards (2024-25): the colours after the last red, and re-spotting. https://www.wpbsa.com/rules/
- Dr. Dave Alciatore, cue ball control, natural angles and position zones. https://billiards.colostate.edu/
- The map, the pace spread, the pack shots and the colour chain come from the physics model used in this series; your table and your pace will differ. The key ball, the 15–30° angle and the "when it goes wrong" choices are coaching advice.
Note: this post is in progress. Planned additions: a map for a straight pot and a 60° cut, and a black-ball line-up with the key ball.